Winter Arrives

Today we have high winds and ice expected. This evening we have up to 9 inches of snow forecasted. So we spent some time adding insulation and plastic to the chicken coop. But despite the unseasonably warm weather our waterer has been froze each morning. So in an attempt to keep the water unfrozen my husband designed a little lightbulb heater using some sheetmetal, a porcelain light bulb socket end a 40 watt bulb. He added two layers of metal with an air pocket between. It’s warm enough to keep the coop above freezing and safe.


Mornings Alone

Since I was a little girl I’ve  been an early riser, early as in between four and five am. I have learned to enjoy this time alone and I usually get a lot accomplished. Today I am planning and starting  Christmas  baking.  Making the weekly bread and planning the menu. 

I am not going to the grocery store and am not researching different areas of interest today  (I will often spend an hour a day in research on things like health, herbs, or soil). No instead,  I am reflecting on the meaning of Chistmas for me and spending time in thought and prayer.  


Blog

I’m going to start the blog again and share  that to the Facebook page rather than posting to the Facebook page first. It seems it is what most bloggers do.   I hope to also add a Pinterest site that is linked to the page. I now have enough technology to make it easier and faster.   Please bear with me while I try to navigate unfamiliar waters.

Honeyed Strawberry Rhubarb Jam

Tags

, , , , ,

Avoiding sugar means making some interesting things. Some of it has not been so yummy and some of it has turned out so well I want to make more. This recipe is from the book “Preserving with Pomona’s Pectin”. Pomona’s is a preservative and sugar free pectin that can be used with alternative sugars such as honey, maple syrup, agave nectar, fruit juice concentrate, sucanant, stevia, xylitol, and if you wish, regular white sugar. I ordered my large bulk quantity through Amazon which was far cheaper than the local organic food store. One of the things that is also very different about this pectin is it comes with a calcium powder. The calcium powder activates the jellied portion of the pectin and it is NOT optional. For expert advice on preserving with Pomona’s you will need to search another site. This is my FIRST time ever using it, but I am really excited to be able to make some preserves that my daughter and I can eat. My plans are to use it in yogurt, kefir, ice cream, and on grain free biscuits.

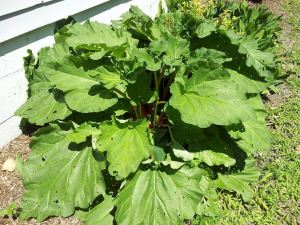
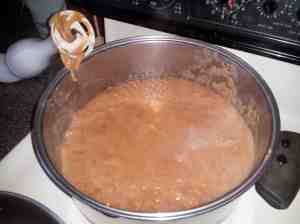
I first washed, hulled, and cut up the strawberries. I then walked out to the garden and gathered my rhubarb which then needed to be diced, boiled, and blended.

rhubarb

I used my handy stick blender. I LOVE that thing!

rhubarb sauce1

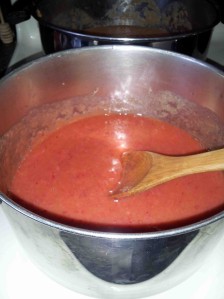
The rhubarb sauce, calcium water, mashed strawberries, and lemon juice were mixed in a sauce pan. This was brought to a slow boil.

jam

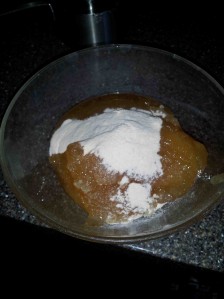
Next step in the process was to slowly added the honey and pectin mixture to the boiling sauce after I mixed them together thoroughly.

honey pectin

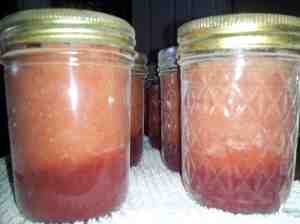
When all the honey was incorporated into the sauce it was ready to jar up and process in a water bath canner. The end product was very yummy and set up much like a freezer jam consistency. THIS is a recipe I will be making a lot of.

straw rhub jars

Recipe: ( I have changed it slightly from the recipe in the book)

2 cups of washed, hulled, and mashed strawberries
2 cups of boiled and pureed rhubarb (add about 1/2 cup of water to start boiling)
2 T lemon juice
2t. calcium water ( to make the water use 1/2 t. calcium powder to 1/2 cup water)
1 cup of honey
2.5 t. Pomona’s pectin

Process for 10 minutes in water bath canner. Let cool 5 to 10 minutes before removing from water and wait for that magic POP of the lids as they seal.  It can take a few hours so don’t worry if they don’t POP right away.  After 24 hours remove rings, check to be sure they are sealed by lightly tugging on the lid,  wash outside of jar, and label (I don’t buy fancy labels. I use masking tape).  I store my home canned goods in a cool dark place.

Time (or lack of) and Garden Update.

Obviously I’ve been pretty busy. Getting the garden garden in, work, strawberries, and the like have kept us so busy we have been falling into bed in exhaustion.

It was a scramble and things got started much later than I had hoped they would but it is filling in nicely now. The girls froze 30 pounds of strawberries since I was to busy to get it done (what would I do with out them?). We have also canned Strawberry-Rhubarb Jam using honey and sugar. The Honeyed Strawberry-Rhubarb Jam will be the subject of my next post. After that I will take you on a picture tour of the garden. But I need to get, the jam is waiting for me to take it out of the canner!

Maple Syrup

Things have been very busy here with spring trying it’s best to show up. We are still hovering in the 30’s most days but I have seeds started and we do have grass starting to green up. That said, we also still have feet of snow in places and no leaves on the trees. Spring is off to a slow start but I know from past experience that it does come every year.

Image


Maple Syrup

Last year we were able to help friends collect and boil down some maple syrup. They also blessed us with 45 gallons of sap to boil down at home.  Which we did over a propane turkey cooker.  It worked great but it was expensive.   This got us thinking that we could do the trees we have here in our yard. Unfortunately, the person that should have been paying attention when the leaves were on the trees dropped the ball (that would be me) and forgot to see what kind of Maple trees we have.  Fortunately, you don’t have to have Sugar Maples to get sap for syrup. In fact you can use Birch and Black Walnut also.  So we decided to give it a whirl.  We knew we wouldn’t get a lot of syrup in the end with only 4 taps and because we got started a little late, the sap had been running a week by the time we got our taps in.

Image

Our taps looked a lot like everyone else’s, but our method of boiling down changed from last year. We decided to burn it down with wood in a homemade rocket style stove.  Rocket stoves burn very hot with just a little wood.  Here is a series of photos to show you how we did it (or rather how the hubby did it).

Image

The screen allows for air flow.  The wood will sit on top of that and burn.  Any ash will fall through. The dirt is to keep a good draft going. This isn’t the correct method for a rocket stove, but we used the materials on hand.  We have built less permanent ones in the ground which work very well because the ground keeps the heat in the bricks and helps it burn hotter.

Image


The sap boiled down very quickly with just a few sticks and small branches from the yard. FREE!  Unlike propane.


Image

In the end we only got 3 yummy pints. I boil the jars to put the boiling syrup in them and then I invert jars. I only do this when I can maple syrup, lard, and grape juice because I don’t actually put these in a canner.  I use the heat of the contents to seal the jars. Maybe this isn’t the way it is supposed to be done but it is the way my mother-in-law taught me and she has done this for 65 years.


The season was short and we were late getting started. Our neighbor saw us tapping and offered her trees for next year.  You can bet that the person in charge of checking leaves will be a little more diligent this year.

More on Stevia

Tags

, , ,

After a couple of questions on how to grow Stevia in the desert and how I use it, I decided to add an experiment (How exciting!  At least to me) and some notes on how I use it in my everyday life.


I sun dried what I grew this year, which wasn’t much since it was my first successful attempt, the rest of the powder I use I purchase through Amazon. If you purchase, get the green leaf organic, which is just the leaves dried and ground to a powder.  Once dried, I put it in a food processor and then a mason jar for storage.

Image (Dried leaves and powdered).


This year I have many more cuttings to work with and I plan on taking a few more so that I can try to keep them growing inside all winter.  I did attempt it this winter with marginal success.  I took the two plants I grew in pots and brought them inside and the one I grew in the garden I transplanted into a pot to join the other two.  Unfortunately, I didn’t bother or think to label them so that I’d know which did better.  Out of the three that I tried overwintering, only one has survived and it is in a sad state.  Of course, there could be other reasons my poor plants didn’t survive. 🙂 

Image


What I will try next winter is using some kind of large clear bag like a 55 gallon clear garbage bag, a big pot, and a tomato cage to see if I can create a mini greenhouse like I do with the cuttings. Our house is warm but very dry with the wood stove and I think it would be worth the effort because as sad as the above Stevia plant looks, I did take fresh leaves off of it all winter. And now I have taken some cuttings from it to grow more.


When I use Stevia it is usually in the dry state. I use it in tea, coffee, and baked goods.  In tea and coffee I use a tea ball or a french press to sift out any leaves.  Stevia will act like tea and float in the liquid, it does not dissolve like sugar or honey.  When I add it to baked goods or smoothies I add it right to the recipe since it won’t float around.   However, I always mix it with honey, dates, or cane sugar because Stevia has a bitter, green leafy taste that I just can’t describe.  Remember when eating it that it gets sweeter the longer it is in your mouth and a little goes a very long way.  

Enjoy! 

~Sid